During my vacations, I decide to play in a different project. I’d like to make some hashi art with packs of used chopsticks my girlfriend is collecting from the Japanese restaurant that she works.
We have hundreds and will reach thousands of chopsticks collected soon. We cleaned them to reuse in some art and we decide to build a plaque with holes that could potentially turn into some art.
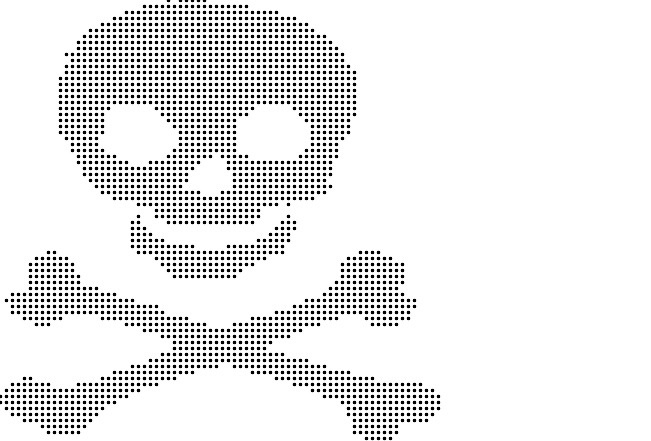
The project is pretty simple, we got a random stencil image from the web, and we want to convert the painted black part into dots. Like this image:

Into dots format:
The software is basic. We navigate into pixels and check if they’re not white. If they’re not the background, we can plot a circle and keep jumping considering a padding and chopstick diameter configuration.
The project is open source here: https://github.com/jonatas/hashi.
So you can play on your own. So, let’s build the idea step by step.
Creating the new project with bundler gem
I love to use bundle gem on all my ruby projects because it’s easier
to start from scratch and easy to adapt later than play in a single file and add the gems manually.
The first step is bundle gem hashi that is supposed to be the name of our project.
Add libraries to the project with bundler add
I love pry, and I need it since the beginning, so let’s add it.
bundle add pry
I also will need RMagick, so let’s add it as well:
bundle add rmagick
Setup pry on bin/console
When you use the bundle gem it creates a bin/console utility that brings your environment into an IRB session. It’s pretty useful for debugging
purposes and understanding the libraries. As the first step, let’s switch to
pry instead of IRB:
#!/usr/bin/env ruby

require "bundler/setup"
require "hashi"
require "pry"
Pry.start
There’s no secret in the code. We just require the bundler requirements plus the files into our project and start a pry session.
The next step is and picks some image to learn the basics of the image reading.
Pick an image from the web with curl
Now, let’s pick some random image from the web to follow the process. I’ll use this one.
Let’s download the image in the project folder naming it skull.png:
curl http://cliparts.co/cliparts/rcj/KMa/rcjKMaMzi.jpg > skull.png
With the skull.png we can play and learn more about the image with RMagick.
Reading image with RMagick
RMagick is a powerful library, and we’re going to superficially cover our needs.
The first thing is to learn more about image details:
require 'rmagick'
Magick::Image.read('skull.jpg')
# => [skull.jpg JPEG 441x651 4)l41x651+0+0 DirectClass 8-bit 56kb]
Check that it returns an array of images because it probably can process multiple images. In this case, let’s pick the first.
image = Magick::Image.read('skull.jpg').first
# => skull.jpg JPEG 441x651 441x651+0+0 DirectClass 8-bit 56kb
Now let’s check some crucial properties to follow our small image processor.
image.rows # => 651
image.columns # => 441
With the number of row and columns, we can navigate pixel by pixel and calculate the position of each pixel discovering the row and column based on the pixel index.
If the image have 651 rows and 441 columns, we can imagine the image have 287091 pixels from (651 * 441) spots we have.
Calculate row and column from pixel index
To discover the row, let’s build some example:
Let’s say that we’re analyzing the pixel 1234:
pixel_index = 1234
row = pixel_index / image.rows # => 1
col = pixel_index % image.columns # => 352
We don’t need the pixel_index, but the col and row values are crucial to plot the dots in the new image.
Now, let’s discover the proper method to get the pixels from image:
image.methods.grep /pixel/ # => [:get_pixels, :store_pixels, ... import_pixels, :each_pixel, :pixel_color]
Cool! looks like we can use get_pixels or iterate directly with
each_pixel.
Following my “Binding Pry Driven Development” flow, let’s jump into the first pixel:
image.each_pixel do |px|
  binding.pry
end
Right after execute this line, it will jump into another pry session:
[1] pry(main)> px
=> #<Magick::Pixel:0x00007f8c2d58fd98>
[2] pry(main)> px.methods.grep /color/
=> [:to_color]
[3] pry(main)> px.to_color
=> "white"
Tada! We have almost all pieces ready to start the real implementation. We know the color and the pixel position.
Let’s start building a smart iterator that can yield the information we need for create the rules and drawings that we want:
def navigate_on_pixels_with_index
  i = 0
  image.each_pixel do |pixel|
    row = i / image.rows
    col = i % image.columns
    yield pixel, row, col, i
    i += 1
  end
end
Also, the method can yield the information we need to create our drawing.
Going back to command line, let’s see how the Draw object works:
draw = Magick::Draw.new
=> (no primitives defined)
[6] pry(main)> draw.methods.grep /circle/
=> [:circle]
One of my favorite shortcuts is $ on pry. It’s a shortcut for show-doc of
something. Let’s inspect the circle method:
[7] pry(main)> $ draw.circle

From: /Users/jonatasdp/.rbenv/versions/2.5.1/lib/ruby/gems/2.5.0/gems/rmagick-2.16.0/lib/rmagick_internal.rb @ line 244:
Owner: Magick::Draw
Visibility: public
Number of lines: 3

def circle(originX, originY, perimX, perimY)
  primitive 'circle ' + sprintf('%g,%g %g,%g', originX, originY, perimX, perimY)
end
You can see the method need the originX and originY that are col and
row position. The perimX and perimY will depend on the hashi
diameter + col and row position.
def draw_hashi_on(row, col)
  hashi_size = 3
  draw.circle(col, row, col + hashi_size, row + hashi_size)
end
We still need to take care of the padding. Otherwise, we’re going to iterate under all the pixels and it will become a blurred image of dots.
As we want to have some distance between the circles, we need to define this distance and ignore the pixels that are not in this position.
def navigate_on_pixels_with_row_and_col
  i = 0
  padding = 8
  image.each_pixel do |pixel|
    row = i / image.rows
    col = i % image.columns
    if (row % padding).zero? &&
        (col % padding).zero?
      yield pixel, row, col
    end
    i += 1
  end
end
Now we’re ignoring all pixels that are not divisible by 8, and it means that we’re jumping every 8 pixels to make the check. Why? Because of if we want only to plot dots every 8 pixels, I don’t need to navigate and check the pixels between them.
Improving our iterator will make it easy to concentrate on your very basic rule:
Non-white pixels should have circles. Putting all together in the process! method:
def process!
  navigate_on_pixels_with_row_and_col do |pixel, row, col|
    if pixel.to_color != "white"
      draw_hashi_on(row, col)
    end
  end
  save_new_image
end
We still missed a final step that saves the new drawing.
def save_new_image
  img = Magick::Image.new(Hashi.image.rows, Hashi.image.columns)
  draw.draw(img)
  img.write('skull-dots.jpg')
end
If you save the file probably it will work in some how.
It was the necessary steps I follow to create this small project. Looking the entire code that accepts the filename, hashi size and padding as a command line input:
require "hashi/version"
require 'rmagick'
require 'set'

module Hashi
  module_function

  def image_file
    @file = ARGV[0] || 'stencil.png'
  end

  def image
    @image ||= Magick::Image.read(image_file).first
  end

  def dots_image_file
    name, extension = image_file.split('.')
    "#{name}-dots.#{extension}"
  end

  def draw
    @draw ||= Magick::Draw.new
  end

  def hashi_size
    @hashi_size ||= ARGV[1]&.to_i || 10
  end

  def hashi_padding
    @hashi_padding ||= ARGV[2]&.to_i || hashi_size * 3
  end

  def padding
    @padding ||= hashi_size + hashi_padding
  end

  def navigate_on_pixels_with_index
    i = 0
    image.each_pixel do |pixel|
      row = i / image.rows
      col = i % image.columns
      if (row % padding).zero? &&
         (col % padding).zero?
        yield pixel, row, col, i
      end
      i += 1
    end
  end

  def process!
    @hashi_map = Set.new
    navigate_on_pixels_with_index do |pixel, row, col, index|
      if pixel.to_color != "white"
        hashi_on(row, col)
      end
    end
    finish!
  end

  def finish!
    print "drawing the new image.."
    img = Magick::Image.new(Hashi.image.rows, Hashi.image.columns)
    draw.draw(img)
    img.write(dots_image_file)
    `open #{dots_image_file}`
    print "... done!"
  end

  def hashi_on row, col
    draw.circle(col, row, col + hashi_size, row + hashi_size)
  end
end
Conclusion
If you look at the code, it has a few extra messages, but the basics are what was explained here.
It walks through each n pixels on an image, check if it’s not a white color and plot a dot. It creates this beautiful effect, and you can expand the program to make other details.
I’m not caring about the code organization but my experience automatically divide the problem into multiple steps, and I organize the methods as I was exploring the library into the console session.
If you know what you want to build, it’s easy to explore focused on the final result you want to achieve. With this prototype, we can easily envision how the final work looks like, how many chopsticks we need and so on.
My code is not tested, and I just had fun with code. My next step is export this coordinated dots positions to work directly into 3D files. I’ll convert to stl file and print it in 3D printing. My idea is creating cylinders from the chopstick coordinates and then use another cube to subtract it and get the perfect plaque with all the holes to make the final hashi art.
